Originally posted on August 26, 2022
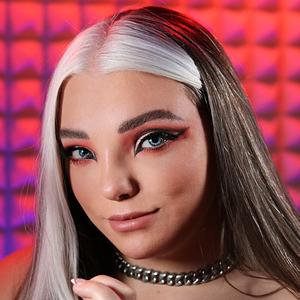
Hi there! I’m Stephanie Peloza - Paidia’s Head Narrative Designer. Before getting into the games industry, I went to school for make-up artistry and design and had a short career in the film industry. Long story short, I ended up a beauty YouTuber with a big focus on nerdy gaming make-up, like Skyrim or Warcraft inspired looks.
Today I want to use my technical knowledge of make-up to help you out with camera-ready streamer looks! The lighting you show up in has a huge impact on what your make-up looks like and what products you should be choosing. I’ll be guiding you through a variety of e.l.f. Cosmetics products that are good choices for the average stream setup and how to use them!
We’ll go through two looks today: a more subtle camera-ready vibe, and a strategic glam gamer upgrade for those days you want to put on the show of your life! Both will be designed specifically to show up great under bright face lighting and to communicate facial features and expressions from far away (or as a small face-cam on a larger stream layout!). We’ll start with skin prep and base make-up, and then you can choose to follow the more subtle or glam upgrade to complete the look!
If you have any questions about make-up or the products listed, let me know in the comments of this article and I’ll do my best to get back to you ASAP!
Let’s get started with skin prep - Step 1:
Skincare is always the first step! Clean & hydrated skin will serve as a much better canvas for products and will hold your make-up for a longer period of time.
I’d recommend e.l.f.’s Holy Hydration! Daily Cleanser to start.
Afterwards, a hydrating mask can be a relaxing and ritualistic way to start your stream glam prep! From the Game Up collection, I used the Rez-Me Awakening Face Mask over my entire face (avoiding the eye area!) and let it sit for 10 or 15 minutes before rinsing gently with cold water to keep that hydration in! Hot water will open your pores and reduce hydration retention - remember: hot water for cleansing, cold for moisture!
After rinsing, I applied the Rez-Me Awakening Eye Cream to hydrate and brighten my eye area as a final prep-step.

Now it’s time for base make-up - Step 2:
Primer helps smooth out textural irregularities on the surface of the skin. This is particularly important under bright studio lighting because texture that is normally invisible can create shadows. I love the Poreless Putty Primer for a smooth, even canvas to start - it feels lightweight but has great results!
I love having a good glow on camera, so I’ve opted for the new Halo Glow Liquid Filter as my foundation (my shade is 2 Fair/Light). If you’d like additional coverage, you can mix it with a higher coverage foundation like e.l.f.’s Flawless Satin Foundation. Halo Glow is specially designed to diffuse light when it hits the skin, blurring and visibly smoothing the skin while providing gorgeous, bouncy glow. This effect is especially apparent on camera! I’ve applied this with the cute heart sponge from the Game Up Extra Life Kit.

After applying foundation, I’ve opted for Hydrating Camo Concealer. I like to use two shades: a lighter one (Fair Warm) for under my eyes and a truer-to-skin one (Light Sand) for spot coverage. You can blend this in easily with your heart-shaped sponge!
Now to set these liquid products! I’ve opted for two powders: a matte powder with blurring properties (Perfect Finish HD Powder) and a reflective powder to enhance glow (Halo Glow Setting Powder)!
First, take the opposite end of your heart sponge (that you didn’t use with liquid product) and saturate it with the HD powder. Then, press this gently into your undereye area to secure the concealer. Make sure to press, not swipe! Swiping motions can displace the liquid product you’ve already carefully placed, whereas a press will set it as-is.
Then, using a powder brush, I’ve applied the Halo Glow Setting Powder everywhere else on my face in order to enhance the glow effect provided by the Halo Glow Liquid Filter. If you have an oily skin type, using the matte powder across your whole face may be a better option to improve long-wear capabilities!
Almost done with the base! At this point, your skin looks GREAT but most of your natural flush and dimension may be hidden by coverage products. To bring definition back to the face, I always like to lightly utilise a contour palette (deeper skin tones may want to use this foundation palette and do contouring prior to powders).

First, use a sculpting face brush with the darkest contour shade. Brush upwards against your cheekbones, starting just below the bone where it meets your ear. Brush upwards and forwards until your brush lines up with the outer corner of your eye. Make sure all contour powder remains below your cheekbone, blended gently upward, rather than directly on top of your cheekbone. You can also place contour from the outer corners of your eyes to your hairline, along the sides of your nose, or below the jawline, if you’d like to increase definition on camera in those areas.
Then, I like to use the second lightest shade on a highlighting brush to contrast the contour, placing it in a line above and below the contour, blending into the skin.
Before we do our reflective highlight, I like to apply a putty blush (my shade is Tahiti!). If you have dry or oily skin, you may want to apply this after foundation and before powder to avoid lifting the product already on your skin. However, I like to apply it at this stage to maintain the hydrated glow the putty product provides! You can use your heart-shaped sponge again - saturate an edge of the sponge and gently tap the blush across the tops of your cheeks, and if you’d like, across the centre of your face for a flushed look!

Afterwards, using a small eyeshadow brush with the lightest, reflective shade in the palette allows you to gently and specifically place where you’d like the light to reflect on camera! I’d recommend the highest and most forward point of the cheekbone (rather than the whole length of the cheek), a tiny bit down the middle of the nose, and across the tip of the nose.
At this point, your base is done. Now it’s time to choose: are you going for subtle camera-ready vibes OR the gamer glam upgrade?
Step 3 Version 1: Subtle Camera Ready Vibes
So, you want to feel ready and put together on camera for your stream but you’re not aiming for a Lady Gaga moment? Okay, I got you!
First things first: let’s frame those eyes! For a quick and easy look like this, I like to use the second lightest shade in my contour palette (the one I used to contrast my contour) on the tip of my finger, washing it across my eyelid.

Now, for a subtle look like this the trick is keeping your eyeliner nice and thin! To achieve this, I like using the H20 Proof Eyeliner Pen. Rather than using it like a traditional marker, I find it’s effective to hold it on it’s side and tap the line into place against the lash line.

Then, you can create a wing on the outer corners of your eye. To achieve as much symmetry as possible, first draw the wing’s angle by following the natural line of your waterline, extending it beyond the outer corner of your eye.
Then, connect the outer corner of that line to your lash line.
Remember: absolute perfect symmetry with your wings is impossible. Don’t worry if it’s slightly different - nobody can look at both of your wings at once!
To help your lashes stand out on camera, I’d recommend curling them with this e.l.f. Pro Eyelash Curler. To enhance the curl more effectively, squeeze a few times close to the root of your lashes (careful not to pinch your eyelid!), and again about halfway up your lashes. Follow this up with a mascara of choice - I like e.l.f.’s Big Mood mascara! Two layers of this product make my lashes appear plump, full, and rich.

That’s it for eyes - now let’s check out brows! Lighter, powdery products can sometimes disappear under bright lights. For this reason, I recommend using a brow pencil that can create defined lines. The Ultra Precise Brow Pencil does this trick well! My shade is Brunette.
First, brush out your brow hairs (upward, and then flat across the top of the brow to keep them tidy!) Then, use the pencil to fill in any missing hairs and to balance the brows on both sides. Similarly to eyeliner wings, nobody can look at both of your eyebrows at once. Sisters, not twins!
Last but not least, especially on a stream where you’ll be talking for hours, is lips! I like to keep lips simple: a lipliner and a gloss. Starting with a neutral shade in the Love Triangle Lip Filler Liner (mine is Soft Pink!), line the edge of your lips, gently blending inward. I top this with the Game Up Bonus Points Lip Gloss Mask in Hidden Treasure - next to the slight yellow of the gloss, teeth can seem brighter!

Now, my favourite part! Set the whole look with the Game Up Shield Me Setting Mist. This product is so refreshing and smells so nice, and will help keep your make-up fresh throughout the day. You can even re-apply every few hours if you like (especially on hot days!).

Hold the mist an arm’s length away from your face, hold (or tie) your hair away so it doesn’t get wet, and spray 3-6 times, trying to cover each side and the front of your face. It shouldn’t feel wet, but it should feel cool and hydrated. If your face is wet, you’re too close!
And VOILA! You’re ready for the bright lights, your camera, and your stream audience! Stay hydrated and have fun.

Step 3 Version 2: Gamer Glam Upgrade
So, you want to channel some video game graphical energy into your look to boost your stream’s power level? I got you!
First things first - since we’re going to be wearing eyeshadow, Shadow Lock Eyelid Primer is absolutely essential! This will ensure your shadows go on smooth, consistent, and improve their long-wear potential. Colourful eyeshadow looks without eyelid primer have the potential to appear chalky, to crease, or to not blend smoothly.
For our eyeshadow today, we’ll be using brushes included in the Game Up Extra Life Kit: the smudge brush and blending eye brush. Grab your Game Up Ready to Play Eyeshadow Palette and let’s begin! This palette has a beautiful range of colours inspired by the vibrant hues of your gaming screens and offers a mix of matte and metallic shades. For my blue eyes, I am going to focus predominantly on the two orange shades and accent with blues. However, brown eyes would really benefit from focusing primarily on purple shades and accenting with greens. That said, you should pick the colours you like best!

For my look, I started with the shimmering orange shadow on the blending eye brush. Saturating the brush well, I’ve pushed the shadow onto my lid for maximum pay-off. A pressing motion will deposit more pigment than a swiping motion - but swiping will blend more effectively! We’ll use both techniques in this look.
After my lid has been covered with the shimmering orange from corner to corner, I switched to the matte orange on the same brush.

This I’ve pressed into the outer V of my eyelid: from the back corner of my eye, up and around into my crease. However, I’ll keep the matte orange to the back half of my eye, rather than bringing it all the way to the front. I’ve pulled the matte orange out towards the edge of my face with a blending, swiping motion, allowing the shadow to blend out into my skin.

Next, I’ve switched to the smudge brush and dipped into the matte blue shadow. I’m pressing this along my lower lashline, starting with a thin application toward the front of my eye and allowing it to expand towards the back of my undereye. Note: You can apply your Shadow Lock Eyelid Primer anywhere you’ll be placing eyeshadow, not just your eyelid!
Once these three vivid hues are in place, it’s time for some graphic liner. The Game Up Eye Win Eyeliner Pots are INCREDIBLE products - beautiful creamy formulas and fun colours make for a must-have in my collection moving forward. For my look today I’ve used Reboot, the black shade, and Lag, the light blue shade. A look more focused on purple might be better paired with FTW, the green shade!

For our liners, we’ll be using the angled eyeliner brush included in the Game Up Extra Life Kit. Gently coat the tip of the brush in Reboot (black) to start - remember, this formula is super creamy! You don’t need to use a lot of pressure on the product, it moves easily.
We’ll be applying the black liner in a wing shape in the back and front corners of the eye! To achieve as much symmetry as possible, first draw the wing’s angle by following the natural line of your waterline, extending it beyond the outer corner of your eye.
Then, connect the outer corner of that line to your lash line.

A similar method can be done in the front, following the natural line of your upper lashline as it descends towards the inner corner of your eye. Then, connect the corner of that line to your lower lashline.
Remember: absolute perfect symmetry with your wings is impossible. Don’t worry if it’s slightly different - nobody can look at both of your wings at once!
Now to get a little wild - grab your secondary shade, Lag! Make sure your eyeliner brush is clean before dipping into this new shade so you don’t cross contaminate the colour. I love doing improvised graphical shapes with colourful liner.

An easy go-to is to mimic the shape of your outer winged eyeliner, creating curved arrow shapes moving toward the outside of your face. However, you can do ANYTHING you like! Sometimes I match the shapes to games I’m playing, or copy graphical looks characters wear in-game. For example, Eivor’s runic facepaint from Assassin’s Creed: Valhalla. Other ideas might be symbols, icons or logos from the game you’re streaming. Get creative!
Once you’re done with your graphic liner, we’ll finish the eyes with lashes. To help your lashes stand out on camera, I’d recommend curling them with this e.l.f. Pro Eyelash Curler.
To enhance the curl more effectively, squeeze a few times close to the root of your lashes (careful not to pinch your eyelid!), and again about halfway up your lashes. Follow this up with a mascara of choice - I like e.l.f.’s Big Mood mascara! Two layers of this product make my lashes appear plump, full, and rich.
That’s it for eyes - now let’s check out brows! Lighter, powdery products can sometimes disappear under bright lights. As well, more dramatic eye make-up sometimes calls for a more defined brow to balance the face. For this reason, I recommend using a brow pencil that can create defined lines. The Ultra Precise Brow Pencil does this trick well! My shade is Brunette.
First, brush out your brow hairs (upward, and then flat across the top of the brow to keep them tidy!) Then, use the pencil to fill in any missing hairs and to balance the brows on both sides. Similarly to eyeliner wings, nobody can look at both of your eyebrows at once. Sisters, not twins!

Now, a special detail using a really cool element of the Game Up Extra Life Kit: face gems! These are self-sticking detail gems you can do almost anything with: they’re suitable for face, body and nails. For this look, I’ll be doing an asymmetrical placement around the eye closer to the camera for my stream set-up, and a small detail on the other eye.
You can use your fingers to stick these directly on, but for long-wear purposes I like to use a little bit of eyelash glue on the back of my hand. Then, I grab the gem with a pair of tweezers and gently dip the backside into the glue, letting it dry for a few moments before pressing the gem into place on my face.
Have fun with this - you can do one or two gems, or the whole sleeve! I used two hearts and about eight or nine of the small circular stones - and they’ve totally revived my interest in glueing things to my face (I once used old microchips for a robot inspired look). Niche, I know. Try it out though!
Last but not least, especially on a stream where you’ll be talking for hours, is lips! I like to keep lips simple, especially with more dramatic eyes: a lipliner and a gloss. Starting with a neutral shade in the Love Triangle Lip Filler Liner (mine is Soft Pink!), line the edge of your lips, gently blending inward. I top this with the Game Up Bonus Points Lip Gloss Mask in Hidden Treasure - next to the slight yellow of the gloss, teeth can seem brighter!

Now, to keep it all secure: Set the whole look with the Game Up Shield Me Setting Mist. This product is so refreshing and smells so nice, and will help keep your make-up fresh throughout the day. You can even re-apply every few hours if you like (especially on hot days!).
Hold the mist an arm’s length away from your face, hold (or tie) your hair away so it doesn’t get wet, and spray 3-6 times, trying to cover each side and the front of your face. It shouldn’t feel wet, but it should feel cool and hydrated. If your face is wet, you’re too close!

And DONE! You’re ready to take on the virtual world in style with a dramatic and eye catching look. Honestly, taking the time to create signature make-up looks like this can be a secret weapon in your arsenal of building a streaming audience. In my YouTube days, my signature double-winged black eyeliner look was a huge component of being recognizable at a glance, which can have an effect on your ability to grow a community. This isn’t a MUST, but can definitely make a difference!
All in all though, the most important thing with make-up is that you have fun. The Game Up line is perfect for that with it’s range of colours and unique, one-of-a-kind products that can totally define your look.
Make sure to check out www.elfcosmetics.com to browse more beauty products & tools to level up your streaming game!
This is Stephanie, signing off!
v


